

Steel building construction involves planning, designing, and building structures with steel frames and related building components. It is commonly used for warehouses, manufacturing facilities, agricultural buildings, commercial spaces, and industrial projects that need strength, open floor space, and flexible layouts.
At Systems West, we support commercial, industrial, and agricultural building projects, including pre-engineered metal buildings and custom structural steel work. This guide explains the steel building construction process, key planning decisions, cost factors, foundation options, and how to choose a contractor for your project.
What Is Steel Building Construction?

Steel building construction is the process of designing, engineering, fabricating, and assembling a building that uses steel as its main structural material. These buildings serve many purposes, including warehouses, manufacturing facilities, agricultural buildings, commercial spaces, and equipment storage. The right construction method depends on the building’s purpose, required layout, structural loads, and project specifications.
Pre-Engineered Metal Buildings
Pre-engineered metal buildings use factory-designed and fabricated components that are made to fit together according to approved plans. These systems commonly include steel frames, roof panels, wall panels, and secondary framing. They are often used for warehouses, workshops, agricultural facilities, and commercial buildings.
Because the components are prepared before they arrive at the site, construction teams can coordinate fabrication with site preparation and foundation work. However, the building still needs proper engineering, permits, and installation based on local conditions and building codes.
As an authorized Butler Builder, Systems West can help businesses plan pre-engineered metal building projects based on their facility requirements.
Custom Steel Building Construction
Custom steel building construction is suited to projects that need specific structural designs, layouts, or load requirements beyond a standard building system. It may involve structural steel beams and columns, mezzanines, equipment platforms, overhead crane supports, or modifications to existing facilities.
The design must account for how the building will be used, the loads it needs to support, available space, and applicable building codes. Custom steel work can also support commercial and industrial expansions where existing structures need additional space or specialized features.
Systems West provides custom structural steel work for projects that require building modifications, structural upgrades, or specialized installations. The scope depends on the project’s engineering and construction requirements.
Why Choose a Steel Building?
Steel buildings offer structural strength, flexible layouts, and practical options for commercial, industrial, and agricultural projects. They can be designed for different building sizes, site conditions, and operational needs, making them suitable for warehouses, manufacturing facilities, workshops, and equipment storage.
One major benefit is the ability to create open interior spaces with fewer columns, depending on the building’s design and span requirements. This gives businesses more room for equipment, storage, vehicle movement, and production activities. Steel components can also be fabricated before arriving at the site, allowing foundation work and material preparation to be coordinated with the construction schedule.
Steel construction can also support more sustainable building practices. Factory-based fabrication may help reduce material waste and limit some activities at the construction site. Steel components may also be reused or recycled at the end of a building’s service life. Burgan and Sansom (2006) discuss these potential benefits as part of sustainable steel construction.
Steel buildings also offer design flexibility. Door locations, building height, insulation, and interior layouts can be planned around the intended use. If a business expects to grow, future expansion may also be possible when the original design, site layout, and structural system allow for it. Proper engineering is essential to account for loads, local building codes, and site conditions.
Planning a Steel Building Project
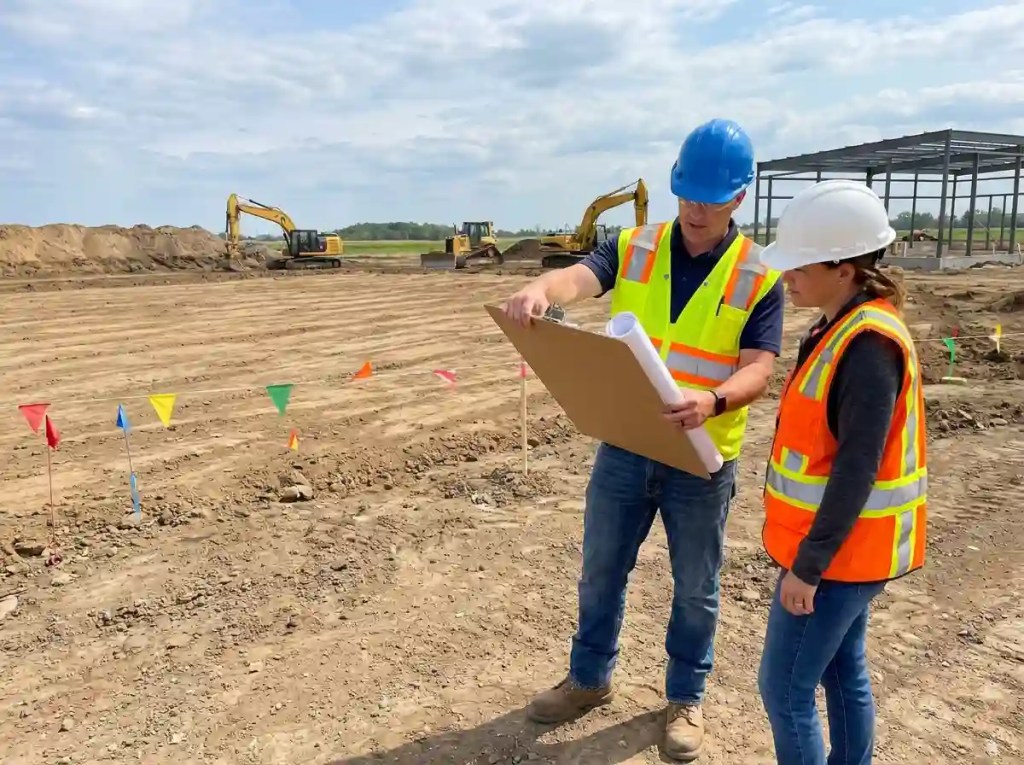
Good planning helps keep a steel building project on schedule, within budget, and aligned with the needs of the business. Before construction begins, define how the building will be used, review the site, plan essential features, and understand local permit requirements. These decisions guide the design, engineering, material orders, and construction process.
Define the Building's Purpose, Size, and Layout
Start by identifying the building’s main purpose. A warehouse may need large storage areas and loading space, while a manufacturing facility may require room for machinery, production lines, and material handling. Agricultural buildings, workshops, and commercial facilities have different space and access needs.
Determine the building’s length, width, height, bay spacing, and required clear-span area. Consider how people, vehicles, materials, and equipment will move through the building. Planning for future growth at this stage may also help avoid costly changes later.
Choose the Right Construction Site
The construction site affects foundation design, drainage, access, and overall project costs. Before finalizing the location, review soil conditions, ground levels, water drainage, and the space available for construction equipment and material deliveries.
Truck access and crane setup areas are especially important during steel frame installation. Check whether the site has suitable access roads, space for material storage, and connections to required utilities. A geotechnical investigation may be needed to help engineers determine suitable foundation requirements.
Plan Doors, Utilities, and Interior Requirements
Decide where overhead doors, loading doors, personnel doors, windows, and equipment openings will be located. Their sizes and positions affect the steel frame, wall panels, and building layout, so finalize these details before fabrication begins.
Plan electrical service, lighting, plumbing, drainage, heating, ventilation, and air conditioning according to the building’s intended use. If the facility needs offices, restrooms, mezzanines, or specialized equipment, include those requirements in the initial plans. Early coordination can reduce changes after the foundation or steel frame is in place.
Understand Permits and Building Codes
Most commercial and industrial steel building projects require permits and must meet applicable building codes. Requirements vary by location, building size, intended use, occupancy, and site conditions. Depending on the project, approvals may cover zoning, setbacks, structural design, fire access, stormwater management, utilities, and accessibility.
Structural plans must account for applicable design loads, including local snow and wind requirements. Check with the relevant local authority before construction begins, and allow time for plan reviews and approvals. Confirming these requirements early helps prevent design changes and delays to fabrication or installation.
Steel Building Design and Foundation Requirements
Steel building design and foundation planning must work together to support the structure safely. Building size, intended use, soil conditions, and local building codes all influence engineering decisions. Finalizing these details early helps prevent costly changes during construction.
Structural Engineering and Building Specifications
Structural engineers prepare plans based on the building’s dimensions, intended use, site conditions, and applicable codes. Building specifications define the framing, materials, roof and wall systems, connections, and openings needed for fabrication and installation.
Steel Frames and Load Requirements
Steel frames typically include columns, beams or rafters, bracing, and secondary framing. Engineers account for the building’s weight, snow and wind loads, and additional loads from equipment or overhead cranes. These requirements must be addressed before fabrication begins.
Common Foundation Options
Foundation selection depends on soil conditions, structural loads, and building use. Common options include:
- Concrete slab: Common for warehouses, workshops, and commercial facilities.
- Pier foundation: Uses individual concrete supports beneath designated columns.
- Perimeter wall or grade beam: Supports building edges and may meet specific frost protection or elevation requirements.
A qualified engineer should determine the appropriate foundation design for the project.
Site Preparation and Anchor Bolts
Site preparation may include clearing, grading, drainage improvements, and soil preparation. Anchor bolts must align with the approved drawings because they connect the steel frame to the foundation. Checking their placement before concrete work and verifying the foundation before erection helps reduce installation delays.
What Is Included in a Steel Building Package?
A steel building package typically includes the main components needed to assemble the building’s structural frame and exterior shell. However, the exact contents depend on the supplier, building system, and project specifications. Reviewing the package before ordering helps clarify what is included and what requires separate planning.
Structural Framing, Roof Panels, and Wall Panels
Most steel building packages include primary frames, secondary framing, roof panels, wall panels, trim, flashing, fasteners, and connection materials. Primary frames support the main structural loads, while secondary framing supports the roof and wall panels. Trim and flashing help protect edges, corners, and joints from weather.
Optional Components and Items That May Be Excluded
Depending on the package, optional components may include doors, windows, insulation, gutters, downspouts, and framed openings. Items such as site preparation, foundation work, concrete, permits, electrical systems, plumbing, HVAC, fire protection, and interior finishes may be priced separately.
Steel Building Cost Factors
Steel building construction costs depend on the building’s size, design, site conditions, materials, and installation requirements. Understanding these factors helps you plan a realistic budget and compare estimates based on the full project scope.
Building Size, Design, and Materials
Building dimensions, height, bay spacing, and clear-span requirements affect the amount of steel and framing needed. Costs can also vary with roof design, doors, windows, insulation, structural loads, and specialized features such as overhead crane supports. More complex designs may require additional engineering and fabrication.
Foundation, Site Work, and Installation
Site preparation and foundation work can add significantly to the total cost. Grading, drainage improvements, soil conditions, concrete work, utility connections, and difficult site access may increase expenses. Installation costs also depend on labor, crane requirements, material delivery, and project complexity.
How to Compare Steel Building Estimates
When comparing steel building estimates, check what each proposal includes. A building package price may not cover the foundation, site work, erection, utilities, or interior finishes. Review the specifications, labor, delivery, engineering, permits, exclusions, and expected schedule to compare proposals fairly.
Steel Building Construction Process: Step by Step
The steel building construction process involves several stages, from final design and site preparation to frame installation and final inspections. Coordinating each stage helps reduce delays and keeps the project aligned with its plans and specifications.
Finalize Design and Engineering
Confirm building dimensions, structural drawings, load requirements, door locations, and material specifications. Obtain required permits and approve the final plans before fabrication begins.
Prepare the Site and Foundation
Clear and grade the site, address drainage, and prepare the ground according to the project plans. Complete the foundation and verify anchor bolt placement before steel erection starts.
Fabricate and Deliver Steel Components
Steel frames, secondary framing, roof panels, wall panels, and other specified components are fabricated according to the approved drawings. Coordinate delivery and material storage so components are available in the correct sequence.
Erect the Steel Frame
The construction crew installs columns, beams or rafters, bracing, and secondary framing. The frame must be properly aligned, connected, and braced according to the engineering plans before the next stage proceeds.
Install Roof, Walls, Doors, and Insulation
Once the frame is ready, crews install roof and wall panels, flashing, trim, and specified doors and windows. Insulation and weather-sealing details should follow the building design and manufacturer’s requirements to help control heat transfer and moisture.
Complete Utilities, Inspections, and Handover
Complete electrical, plumbing, HVAC, lighting, and interior work included in the project scope. Required inspections must be completed before occupancy. At handover, review outstanding items and collect applicable warranties, maintenance information, and project documents.
Interior Systems and Finishing
Interior systems make a steel building suitable for its intended use. Requirements vary between warehouses, manufacturing facilities, workshops, and commercial spaces, so plan these systems before construction begins.
Electrical wiring, lighting, plumbing, and drainage should be coordinated with the building layout. Heating, ventilation, and air conditioning (HVAC) help maintain indoor comfort, while suitable insulation and ventilation support temperature and moisture control.
Interior walls, offices, restrooms, and equipment installations may also be needed, depending on the project. Planning utility routes, equipment locations, and wall openings early helps reduce changes after the foundation and steel frame are complete.
Common Steel Building Construction Mistakes
Steel building projects can face delays and extra costs when important planning and coordination steps are missed. Addressing common issues early helps keep construction aligned with the approved design, budget, and schedule.
- Poor site assessment: Overlooking soil conditions, drainage, or site access can lead to foundation problems and added costs.
- Late design changes: Changing building dimensions, door locations, or equipment openings after fabrication begins can delay installation and increase expenses.
- Missed permit deadlines: Starting too late with permits and local approvals can push back construction.
- Weak project coordination: Poor communication between the owner, engineer, supplier, and contractor can cause material delays, scheduling conflicts, and installation errors.
- Choosing a contractor based only on price: A low estimate may exclude important work or leave gaps in the project scope. Compare experience, specifications, included services, and exclusions before making a decision.
How to Choose a Steel Building Contractor
Choosing the right steel building contractor can affect your project’s quality, budget, and schedule. Look for a contractor who understands your building requirements and can coordinate the work from planning through construction.
Review their experience with projects similar to yours, such as warehouses, manufacturing facilities, commercial buildings, or agricultural structures. Ask what services they provide and whether their proposal clearly explains the project scope, materials, labor, site work, and any excluded items.
Planning support is also important. The contractor should coordinate with engineers, suppliers, and other trades to help align design approvals, foundation work, material delivery, and installation. Ask about the proposed schedule, how delays or design changes are handled, and who will communicate project updates.
Steel Building Construction by Systems West
Systems West supports commercial, industrial, and agricultural building projects across Central Minnesota. As an authorized Butler Builder, the company helps businesses plan pre-engineered metal building projects and provides custom structural steel work for facilities that need specialized layouts or structural upgrades.
From design planning and budgeting to fabrication, erection, and building improvements, Systems West helps coordinate construction requirements around each project’s needs. Whether you’re planning a new steel building or expanding an existing facility, the team can help you review your project scope and construction goals.
Plan Your Steel Building Project
Planning a steel building project in Central Minnesota? Systems West brings experience with pre-engineered metal buildings and custom structural steel work for commercial, industrial, and agricultural projects.
Contact Systems West to discuss your requirements and request a quote.
Conclusion
Successful steel building construction starts with careful planning, sound engineering, and a clear understanding of project requirements. Site conditions, foundation design, material selection, and construction coordination all affect the project’s cost, schedule, and long-term performance.
By addressing these factors early and choosing the right building system, businesses can create functional spaces that meet their operational needs and allow for future growth. Working with an experienced construction team also helps reduce avoidable delays and keep the project aligned with its plans and specifications.
Frequently Asked Questions
What are the common uses of steel buildings?
Steel buildings are commonly used for warehouses, manufacturing facilities, agricultural storage, workshops, commercial spaces, and equipment storage. The building’s design depends on its intended use, space requirements, and structural needs.
What is the difference between a steel building and a metal building?
The terms often refer to similar types of structures. Steel buildings use steel as the main structural material, while metal building is a broader term that can describe buildings made with steel or other metals. Many commercial metal buildings use steel frames with metal roof and wall panels.
What information is needed to plan a steel building project?
You should define the building’s purpose, dimensions, site location, access needs, interior layout, equipment requirements, and expected future growth. Local building codes, soil conditions, utilities, and budget also affect the planning process.
How are steel building components connected?
Steel building components are connected using engineered connections, which may include bolts, welds, and specified fastening systems. The connection method depends on the structural design and manufacturer requirements. Proper installation helps the frame perform as intended.
What affects the timeline of a steel building project?
Project timelines depend on design approvals, permits, site conditions, foundation work, fabrication, material delivery, weather, and installation. Coordinating these stages early can help reduce delays and keep construction moving.